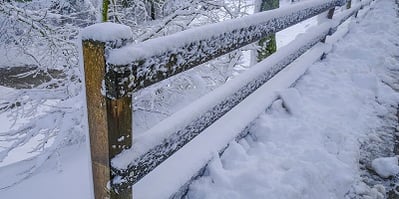
Like many parts of a home or property, fencing may need to be winterized before the winter cold digs its chilly, damaging fingers into the structure. This winterization work may not be necessary every year, but it's a vital part of fence upkeep.
Fortunately, fence winterization is relatively straightforward and usually requires few major tools. Among the essentials for this seasonal job will be a strong fence stapling gun that lets you rapidly and deeply inject staples into pressure-treated lumber. The powerful FASCO® (a BECK member) F70G Fence 45-315 cordless tool is an ideal example. One of its major advantages is the ability to provide deep fastening power that's cordless and thus portable, letting you countersink staples even in fences that are far from electrical sources.
The following tips cover proper fence fastening and other essential aspects of winter fence prep with a focus on lumber fencing. These tips are for both contractor professionals and homeowners alike.
1. Clean Thoroughly and Take Stock
The first step towards thorough fence winterization will simply be to clean the fence and take stock of what needs to be fixed. This means going around its perimeter and removing any dirt, leaves, or debris. This also means pruning back any branches or vegetation that are growing too close to the fence or poking their way into its structural integrity. Pay special attention to low-lying plants or roots that do this too.
2. Shore Up the Weak Spots
Notice any parts that have become loose or weakened through fastening that didn't hold? This is the time to shore these up by re-aligning any loose pickets or boards, removing old loose fasteners, and, using a cordless stapling gun to sink new, fully weather-treated fence staples deeply into any loosened lumber to firmly hold it in place.
3. Replace Rotten and Broken Fencing
If you've had some storms in the past year, or simply haven't maintained your fence in some time, there's a good chance that parts of it are outright broken or rotted through because of the elements and nature. Fixing and replacing these is essential to proper winterization and preventing new winter damage.
The obvious thing to do here is to remove all of the broken or rotted parts of your fence completely and install new ones with well-designed stapling and fastening tools. Be sure to use lumber that's well-treated against the elements and moisture and that your fasteners or staples are also weather-treated.
4. Apply Protective Coating, Again
If you've had to replace rotted or broken parts of your fence, this final step will apply especially because the new lumber should be painted with a protective finish even if it's already pressure treated. However, take a good general look at the fence to see how its existing protective coat is holding up. If it seems a bit worn, consider repainting the entire fence with a fresh layer of waterproof stain or sealer.
A Final Word
One of the most important parts of proper fence winterization is firm fastening. As described above, this means making sure that broken and rotted lumber is removed and that the entire structure is firmly fastened with its replacement parts. The cordless FASCO® F70G Fence Stapling Gun can ensure a strong, lasting job for this crucial part of the work. It's designed to firmly countersink 45mm staples into strong, pressure-treated lumber. Aside from being comfortably weighted and balanced, it also offers a rubber grip for non-slip handling and minimal vibration. For more fence care tips, check out our 5 Important Tips to Build a Perfect Fence eGuide.
.svg.png)


